Products
Solutions
Resources
9977 N 90th Street, Suite 250 Scottsdale, AZ 85258 | 1-800-637-7496
© 2024 InEight, Inc. All Rights Reserved | Privacy Statement | Terms of Service | Cookie Policy | Do not sell/share my information

Cost Item Assemblies allow you to create intelligent construction systems to automatically estimate various scopes of work, based upon a user providing specification and dimension variables. You can create multiple Cost Item Assemblies and maintain a library of construction systems that are used throughout the estimating department. When creating an assembly, it’s helpful to have a solid understanding of the various inputs that will be used and how those inputs will be used to influence the resulting collection of cost items.
Cost Item Assemblies are created by entering a code and description for the assembly. Both fields can be changed at any time.
One scope of work that is part of the estimate is a ductbank. This ductbank work entails excavating, laying the conduit, and then either backfilling it with concrete or soil depending on the location, and all conduit runs consist of two conduits. You want to estimate the cost and hours for this work using a cost item assembly.
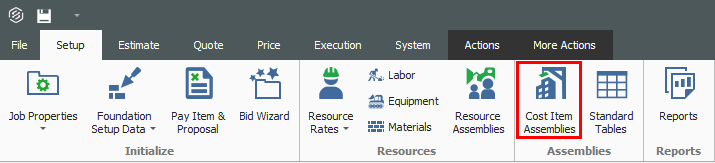
From the Setup tab, click on Cost Item Assemblies.
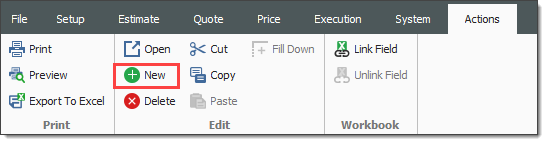
From the Actions tab, click on New.
In the Code field, type TEST – Your Initials.
In the Description field, type Test Cost Item Assembly - Ductbank.

In the bottom right corner, click OK.

Notice that your Cost Item Assembly now shows up in the Cost Item Assembly Register

There is a standard workflow for building cost item assemblies .
Define the desired output from an assembly (cost items).
Decide what questions the estimator will be required to answer (and what assumptions you want to set).
Create input tables for user selections.
Create expressions to provide the required results to populate the cost items.
Once your Cost Item Assembly has been created, it is time to build the assembly. To begin, you first fill out the setup information, then you use the remaining data blocks to build the assembly record.
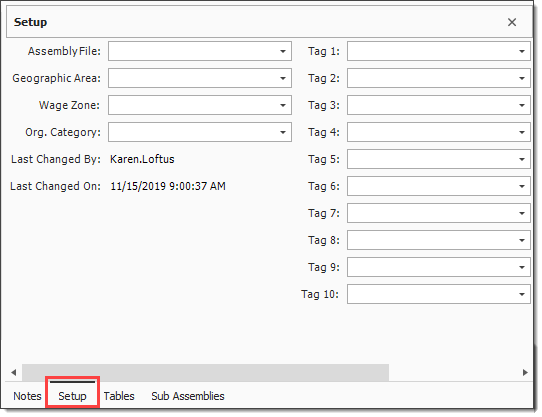
The fields in the Setup tab can be filled with unique names, choice of pull-downs or left blank. The fields on the Setup tab include:
Assembly file
Geographic Areas
Wage Zone
Org. Category
Last Changed By is updated when the definition of the assembly is modified, such as the inputs, calculations, cost items, tables, notes, etc.
Last Changed On is updated when the definition of the assembly is modified, such as the inputs, calculations, cost items, tables, notes, etc.
The Tag and User Defined field can be filled in by the user
The first four fields are used the same way resource attributes are used to filter which resources are imported from the master library into a project. These will appear on the cost basis tab of job properties as filters to determine which cost item assemblies you import into a new estimate.
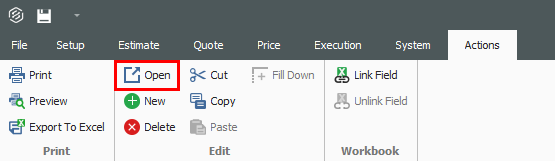
Select your assembly from the list and click Open from the ribbon.
In the bottom right corner, click on the Setup tab.
In the Assembly File drop-down, select Standard Cost Item Assembly File.

Select a Geographic Area and Org. Category.

In the Tag 1 drop-down, select Concrete.
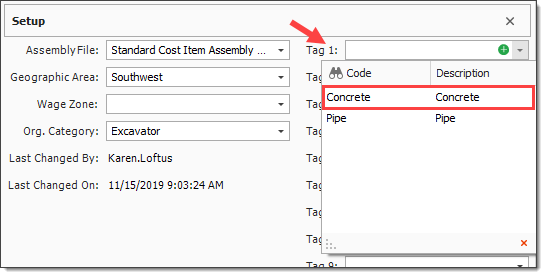

Enter the following, then click OK.

The Cost Items data block is used to create cost item breakdown structure, where you can assign the default values and resource employments and link the results of the calculated values to the appropriate cost item and resource employment fields. This is where you build a framework of cost items that you want as output from this assembly.
Cost Items for a Cost Item Assembly are created within the Cost Item Assembly Record, not in the CBS Register.
There will be at least one cost item with the following default values which you can override.
Default Description is equal to the Assembly Description
Default Forecast (T/O) Qty = 1
This is the top-level cost item in the assembly. Any additional cost items will need to be created as subordinates to this cost item
After you complete the values in the Cost Items data block, the steps included in the Calculations data block need to be completed prior to linking any values to the cost items.
This data block has the same functionality as the CBS register; double-clicking one of the cost items or selecting one of the cost items and choosing Open from the menu will open the Cost Item Record. To quickly perform this work, you can easily copy cost items from the CBS Register and paste them into the Cost Items data block of the Cost Item Assembly Record.
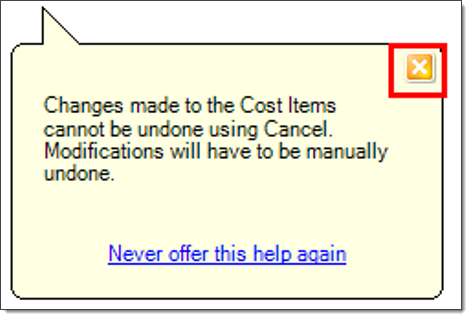
Click X on the pop up.
From the Cost Items data block, right click on your cost item and select Insert Subordinate.
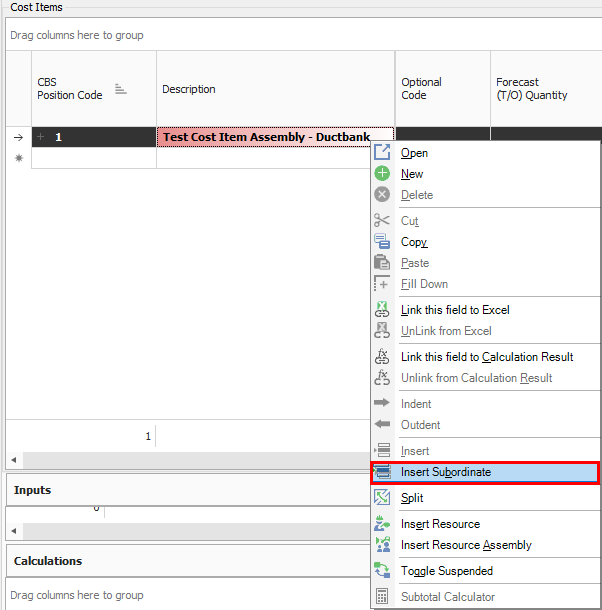
Insert 4 subordinates.

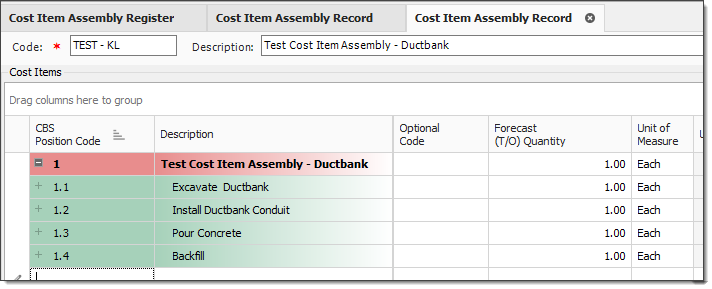
Enter the descriptions and units of measure as follows:
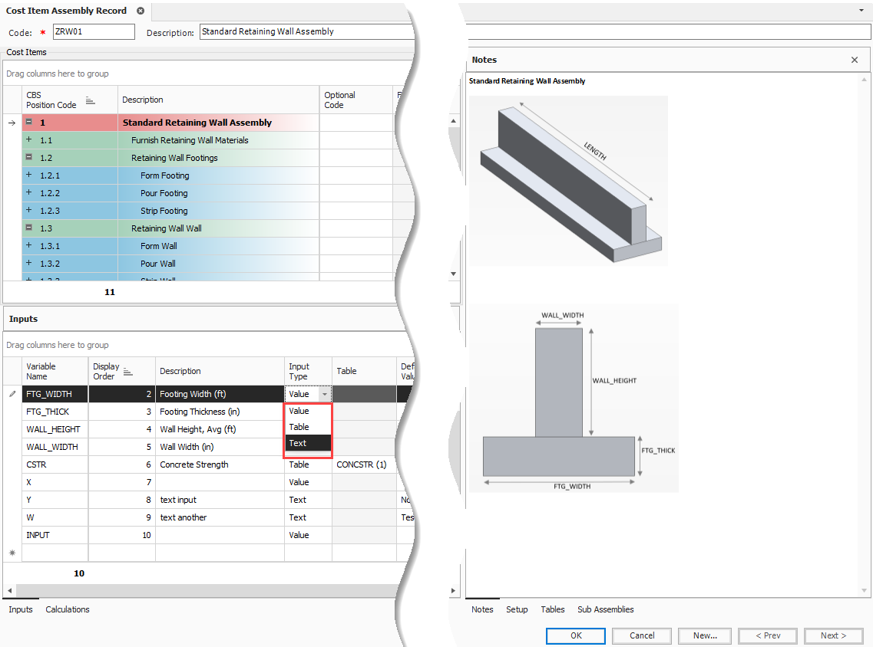
The Inputs data block is where you define the questions that will be asked of the user when they employ a Cost Item Assembly. Inputs can be value, table, text or object type inputs and validation rules can be specified for value-type inputs such as minimum or maximum values that are acceptable, or default values that appear when the Cost Item Assembly is employed. These Inputs will be the parameters used in calculations to drive the Cost Item Assembly outputs.
Tables are used for reference data and can provide functionality similar to a lookup field in excel. Tables may contain account codes, production rates, or other reference fields and can be imported from the Library or copied from one assembly to another. Tables can be assembly specific, project level (Standard), or Enterprise (Library) level (Master Standard). You can populate tables from a project specification list.
The Value field shows the Cost Item Assembly employment dialog input fields with a prefilled value so you don't have to specifically provide or select a value. The Data Validation field determines what type of data validation is enforced when the Cost Item Assembly is employed. This field is enabled only when the Input Type is Value. The selections are shown in the Using the Formula Editor step by step in the Inputs and Calculations Topic:
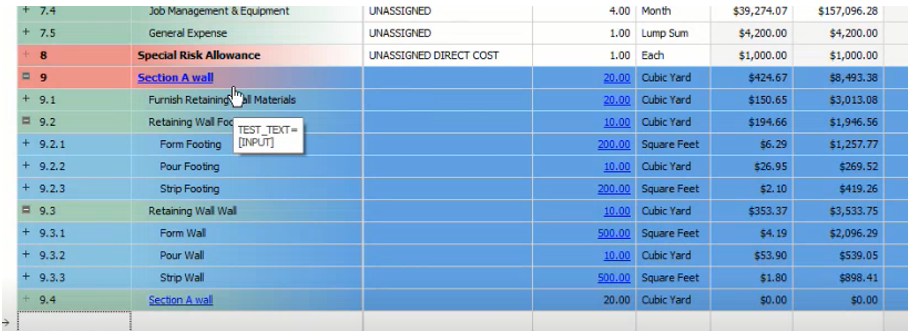
If you are using the same cost item assembly multiple times, the text Input Type can be used with a distinct description to distinguish each of the cost item assemblies in the CBS.
In the CBS Cost Item Assembly Input, you can modify the input value with a descriptive specific to this one entry, in addition to changing other input values. For example, you can change the Standard Retaining Wall Assembly cost item and name it to Section A.
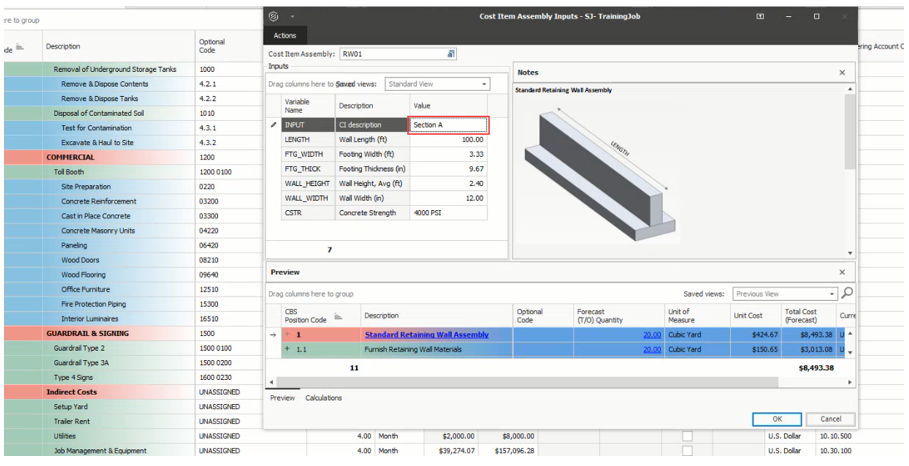
Using the cost item assembly text input values lets you manually enter in a text value to be used in the cost item assembly formula. By not using text input values, if you want multiple sections of a Standard Retaining Wall Assembly, it would be difficult to distinguish between the various instances of the retaining wall assemblies in the CBS.
The object input type lets you choose an object that already exists in Estimate, such as existing tags, resources, or account codes. The object list changes dynamically based on data that exists in the current estimate without requiring a manual update to the Cost Item Assembly table data, so users can choose from valid selections.
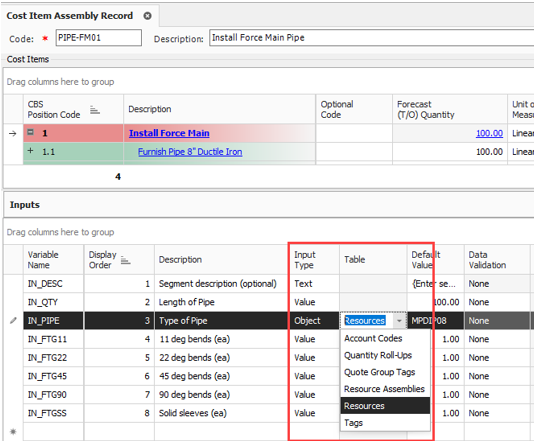
As an example, if you were to employ a pipe installation CIA in the CBS, a Type of Pipe input may be required, and by using an Object type input variable, the assembly can show a Resource Selection Register, requiring you to select from a list of resources that currently exist in the job.
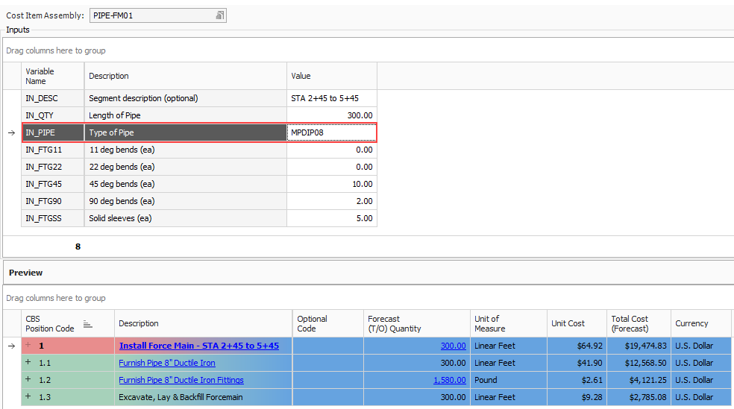
Picking an Object that exists in the job helps ensure the formulas that use those objects return valid results, such as linking a formula result to the resource employment for the MPDIP10 Pipe 8” Ductile Iron resource as picked from the Resource Rate register.
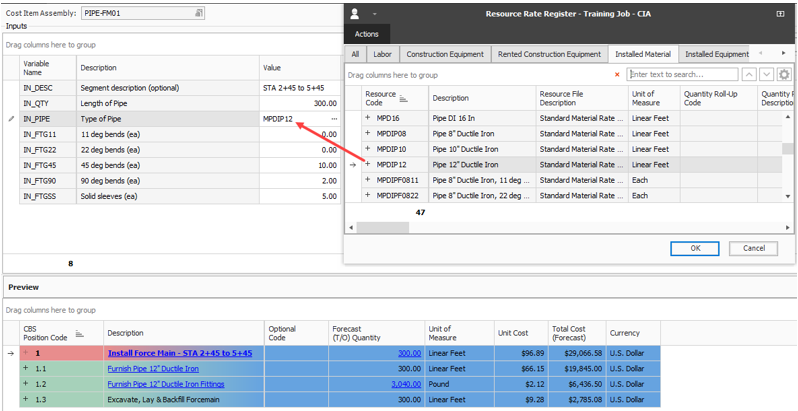
Additionally, selection registers often permit new objects to be added on the fly, so if a resource or tag value is missing from the job, it can easily be added while employing the Cost Item Assembly.
Object Type inputs can be used in formulas by directly referencing either the Code or the Description as attributes of the input variable. These two fields can be easily referenced and selected using the Formula Editor.
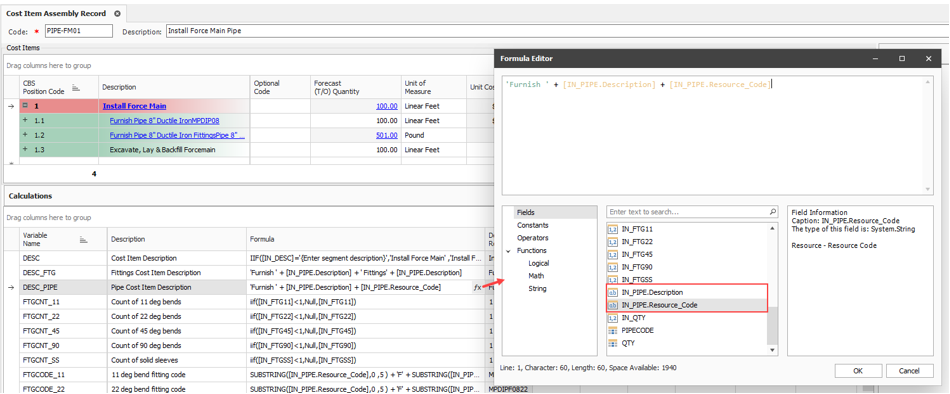
The ObjectValue function accepts an object type, the key code field and the desired name of the field to be looked up and will return the value of the lookup field for use in a formula.
In the following example, The ObjectValue function looks up the value stored in the User Defined 1 field of the resource whose resource code is stored in the FTGCODE_11 variable. In this case, the return value represents the material resources unit weight and is used to calculate the total weight of the material being installed.

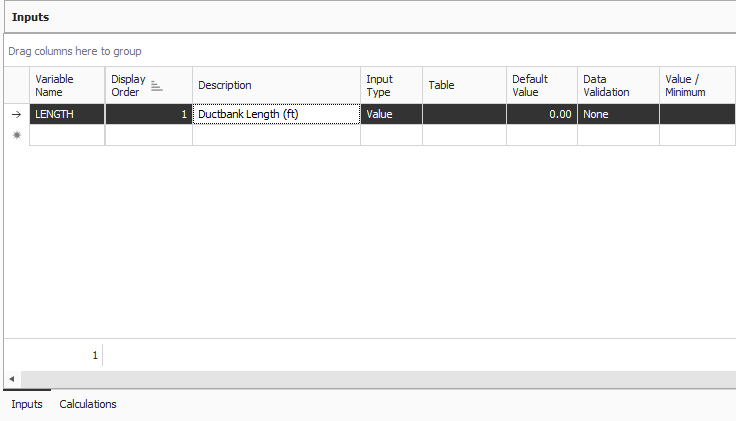
Navigate to the Inputs data block. In the first empty field under Variable Name, type in the name of a variable that will be referenced in the formula expressions, such asLength, then press Tab.
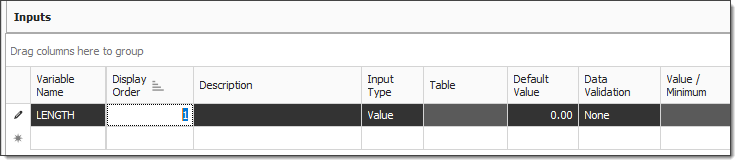
The Variable Name is a free text field and is determined based on how the calculations are referenced in the input values.
The Display Order field can be set to control the order in which you are prompted to provide the input values
Select the Description field and type Ductbank Length (ft), then press Tab.
In the Input Type field, select Value from the drop-down list. In the Default Value field, type 100.
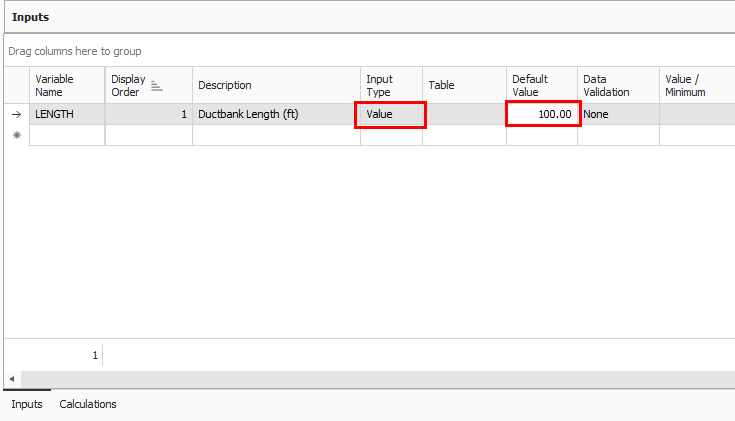
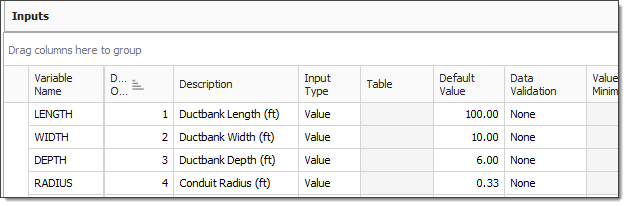
Fill out additional fields as shown below:
The Data Validation field determines what type of data validation is enforced when the Cost Item Assembly is employed. This field is enabled only when the Input Type is Value. The data validation options are as follows:
|
Selection |
Description |
|---|---|
|
None |
No validation is enforced, and any numeric value is permissible. |
|
Equal |
Permits the entry of a value that is equal to the value entered in the Value/Minimum field. |
|
Not Equal |
Permits the entry of a value that is not equal to the value entered in the Value/Minimum field. |
|
Greater Than |
Permits the entry of a value that is greater than the value entered in the Value/Minimum field. |
|
Greater Than or Equal |
Permits the entry of a value that is equal to or greater than the value entered in the Value/Minimum field. |
|
Less Than |
Permits the entry of a value that is less than the value entered in the Value/Minimum field. |
|
Less Than or Equal |
Permits the entry of a value that is less than or equal to the value entered in the Value/Minimum field. |
|
Between |
Permits the entry of a value that falls between the range of numbers defined by the values entered in the Value/Minimum field and the Maximum field. |
|
Not Between |
Permits the entry of a value that does not fall between the range of numbers defined by the values entered in the Value/Minimum field and the Maximum field. |
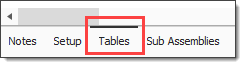
In the bottom right corner of the Cost Item Assembly Record, click on Tables.
Right click in the Table Code field and select New.

In the Code field, type CONC – Your Initials, and in the Description field, type Concrete Types.

In the Columns section, enter in the following column names and descriptions, choosing the Text Type.

Click OK in the bottom right corner.

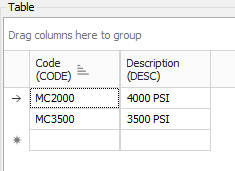
In the Tables section, enter in the following data for the Concrete resource codes and types:
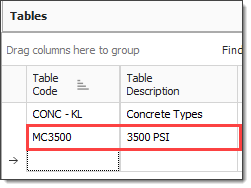
Click OK in the bottom right corner.
Add the following input, selecting Table for the Input Value from the drop-down.
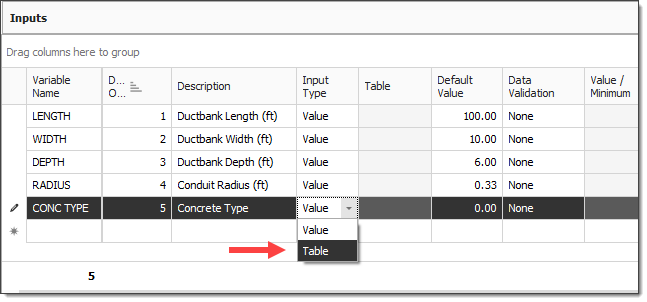
From the Table drop-down list, select your CONC table.

In the Setup tab, you can create standard tables for the project. These are created exactly like tables within the Cost Item Assembly Record. All users in the project have access to the standard tables. These tables can be copied and pasted into the Cost Item Assemblies’ tables. You can create, edit, or delete standard tables from the Standard Table Register. You can copy Standard tables from the library, to the library, and from another job.

Conditional input expressions can include variables that reference other input values or ask simple Yes/No questions. This allows the user to provide answers to inputs, which are then used to determine if the user is asked to provide more answers for additional inputs. The variable Default Value is used in the conditional input expression, so the input is always hidden when the Cost Item Assembly is initially employed. Therefore, the Default Visibility checkbox is not selected, and when you create an estimate and employ the Cost Item Assembly in the Cost Item Assembly Inputs view, the conditional input is hidden.
You can then provide information and enter a dimension or a response to a question. Note that:
If the value entered changes the expression result to True, the conditional input shows
If you want to see all the inputs in a Cost Item Assembly even if their conditions are not currently evaluating to True, you can click View in Cost Item Assembly Inputs, and then select Show Hidden Inputs. This will display all the conditional inputs for the Cost Item Assembly
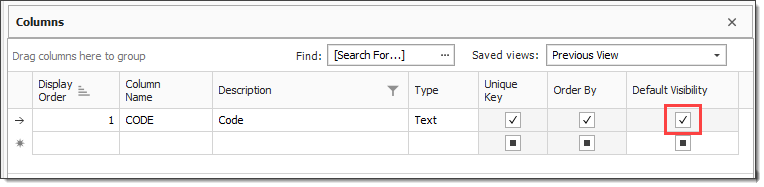
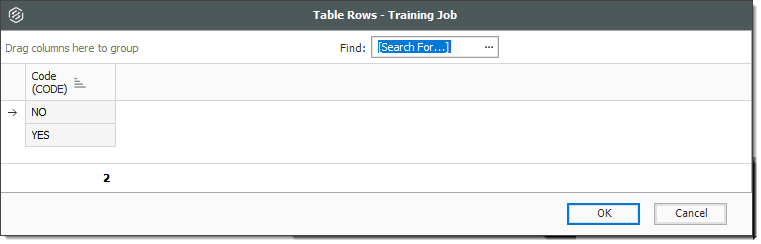
To make it easier for users to select data from tables, you can hide unnecessary table columns in the Table Row Selection Register
In both Cost Item Assembly Register and Standard Tables Register, go to the Columns data block and clear the Default Visibility checkbox to hide columns in the table
More user tags and user defined fields are available on the Cost Item Assembly > Inputs data block related to a group of variables or with other similarities. A Standard View also exists, so you can define saved views to make use of the additional tags and fields.
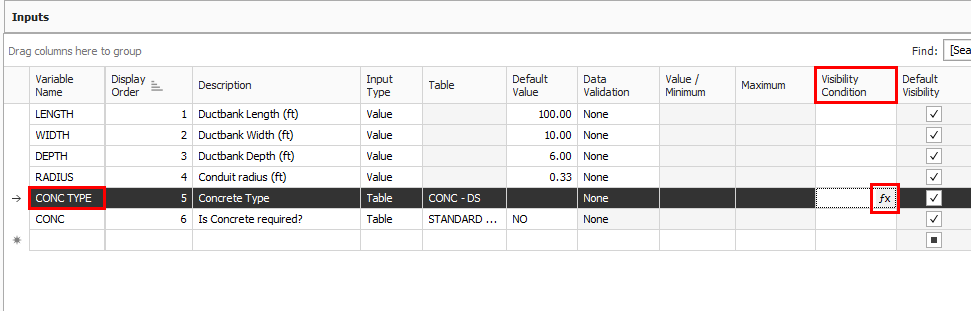
Create a new input as follows, choosing Table as the Input Type, and selecting Standard Table from the drop-down.
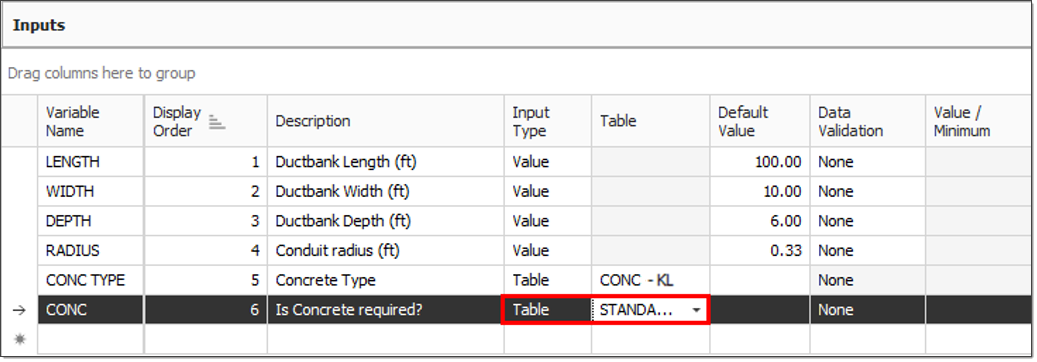
Set the Default Value of the CONC variable as No, then click OK.
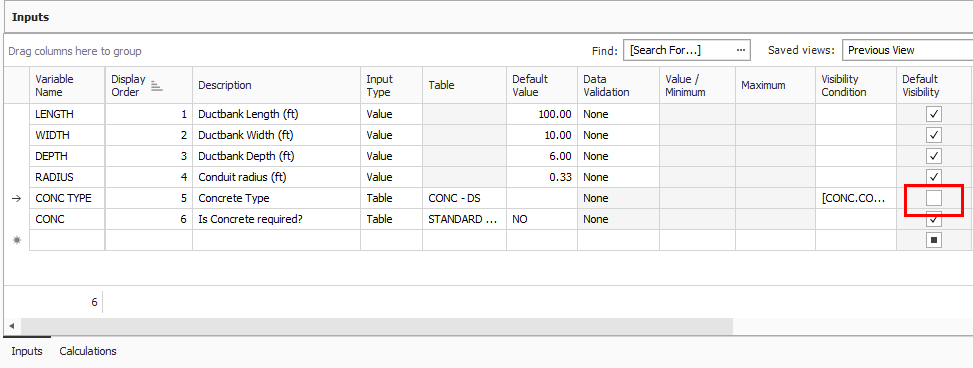
In the Visibility Condition field for the CONC TYPE variable, click the fx button.
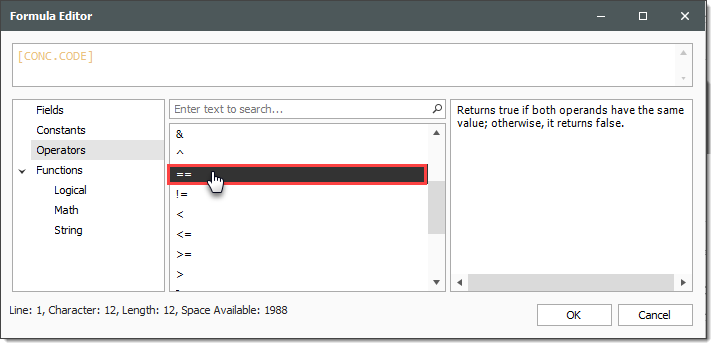
In the Formula Editor, and from the Fields section, double click [CONC.CODE].

In the Operators field, double click on the ‘==’
In the Formula Editor, type ‘Yes’.
Click OK.
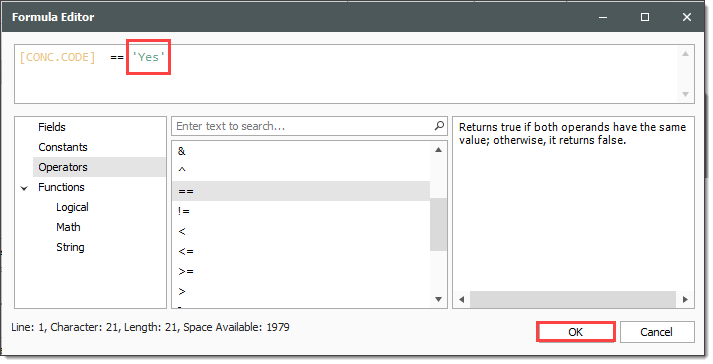
Notice that the Default Visibility field for CONC TYPE becomes unchecked
This means that only when the answer to Is Concrete required is Yes, the CONC TYPE input will become visible; otherwise, it will stay hidden
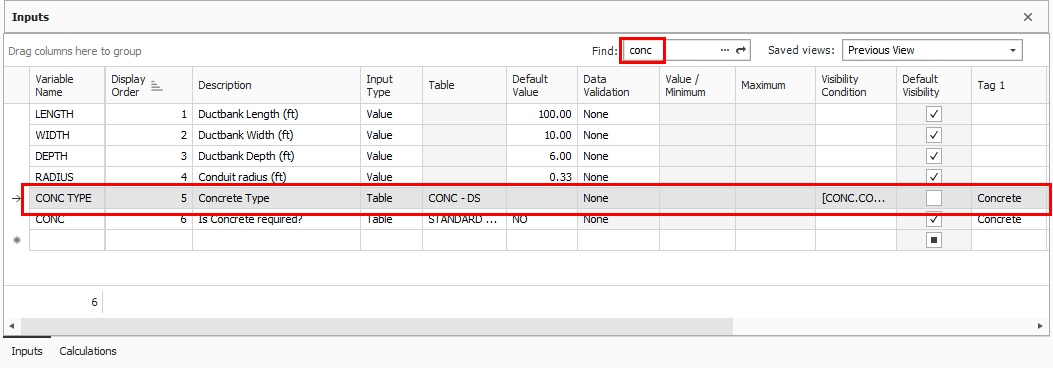
In the Tag 1 fields for CONC TYPE and CONC, select Concrete.

In the Find field under Inputs, select Tag 1.
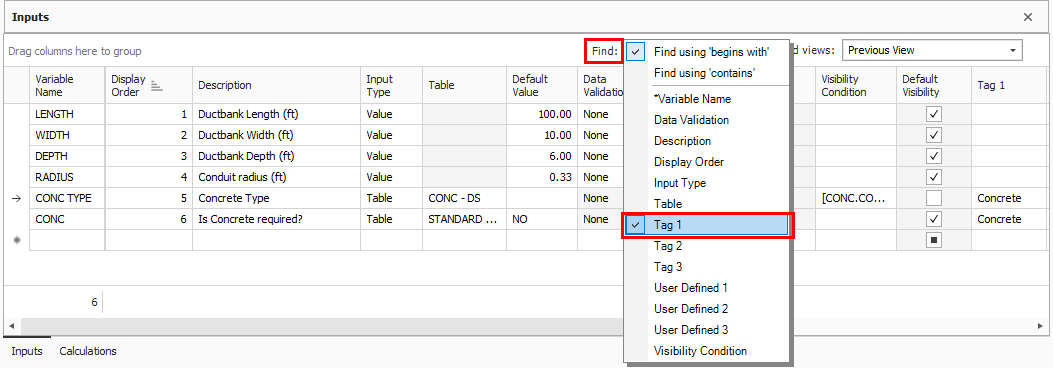
Begin typing in Concrete and notice that the CONC TYPE row becomes highlighted.
Calculations are values produced from expressions that utilize hard values, input values, and lookup values. They can be numerical, Boolean, and/or character expressions. These calculations will provide the method to produce values to use with the cost item output of the assembly. Variable names can contain these special characters:
A-Z
0-9
_
? (Null)
The Formula field enables you to create your own custom expressions. You can take assembly inputs and calculate results. Calculation results may be used in other calculations or linked to an assembly’s cost item register field values. Formulas can be created with numbers, math operators (e.g., + or – for addition or subtraction), input variable values or other calculation results, table lookup values, or any number of functions that are built into the Formula Editor.
The following formula shows an example of how to calculate the cubic foot volume of concrete in a 10’ wide by 15’ long by 6” thick slab on grade. The resulting answer is 75 cubic feet.

To calculate the same volume in cubic yards (there are 27 cubic feet in a cubic yard), the formula can be rewritten as follows. The resulting answer is 2.78 cubic yards.

Variables are placeholders for values that can be changed based upon user input or calculation results, and they can be used to simplify a complex formula. Variables require a name that is unique within the Cost Item Assembly, and the syntax for referencing a variable in a formula is to enclose the entire variable name in [brackets]. Using the preceding example, a calculation named [VOL_CUFT] determines the cubic foot volume of 75. The second formula then references the value stored in the variable [VOL_CUFT] and divides it by 27 to calculate the cubic yard volume of 2.78.

Input variables are also used to store user inputs as described above. In the following example, three inputs are created in the Inputs section of the Cost Item Assembly and employing this Cost Item Assembly will prompt the user to provide the values for the width, length and thickness of the concrete slab, those values are stored in the variables named [WIDTH], [LENGTH] and [THICK] respectively.

The [VOL_CUFT] calculation in the following example is the same as in the preceding example, but replaces the 10 foot, 15 foot, and 6 inch values with the variable names, which you would provide when the Cost Item Assembly is employed.

As in the preceding example, the [VOL_CY] calculation takes the result of the [VOL_CUFT] calculation and divides by 27 to convert the volume from cubic feet to cubic yards.
Functions can be used to expand the power of a formula by performing special types of operations on the formula’s values. Functions are most commonly used by the name of the function, followed by the values that the function will use to perform the special calculations.
As an example, the Ceiling() function can be used to take the result of a calculation and round it up to the nearest whole number. In using the concrete slab example from above, the calculation [VOL_BUY] will take the result of the [VOL_CY] calculation and round it up from 2.78 CY to 3.00 CY using the syntax Ceiling([VOL_CY]), which represents the amount of concrete you would want to purchase for this work.

Creating valid formulas can be challenging when calculations start to become more complex. Improper referencing of variables, incorrect spelling of functions, or invalid mathematical operations are all examples of ways in which a formula expression can be invalid. When a formula results in an invalid expression it will return a NULL value. A NULL value is displayed using a ‘?’ character and will preclude you from employing the Cost Item Assembly in the job. In the following example, a formula that divides any number by zero generates a mathematically invalid result and is indicated by the ‘?’ character.

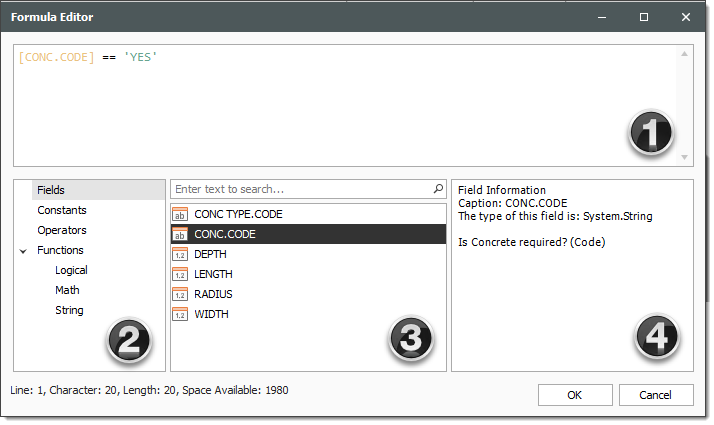
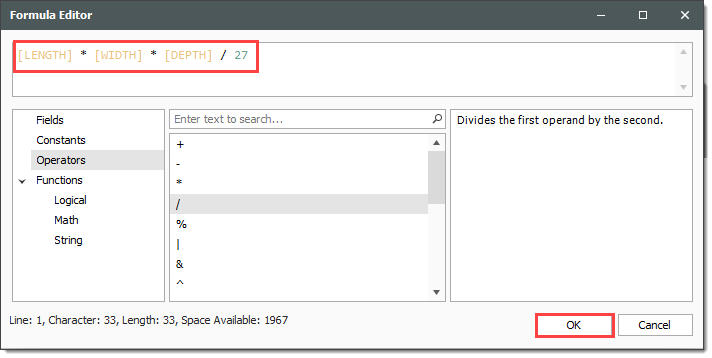
The Formula Editor is a tool you can use to assist in the creation of validated formulas that correctly reference variables and ensure the use of proper syntax. Select the fx button to open the Formula Editor.
|
Element |
Description |
|
|---|---|---|
|
1 |
Expression Box |
Type your formula expression here or add expression elements by double clicking items in the Expression Values section as described below. |
|
2 |
Expression Elements |
Click on an element type to view its categories in the Expression Values list (3). |
|
3 |
Expression Values |
Double-click a value to add it to the Expression Box.
|
|
4 |
Information and Help |
When an expression is selected from the Expression Values list (3), an explanation of that expression and how it is used will appear in this window.
|
Within the Formula Editor, you can use tables to provide reference data for use in calculations. For example, the following illustration shows a table that stores values for various Concrete Strengths along with their associated resource code values.
Drag the Calculations data block into view.

In the Variable name field, type Volume, then press Tab.

The Variable Name field in the Calculations section will be the name that other Calculations can refer or link to and this name must be unique within the context of the Cost Item Assembly, and unique with respect to input variable names.
Enter the Description Ductbank Volume, then press Tab.

In the Formula field, select the fx formula editor button.

Select the Field values and Operators as indicated below to create the displayed formula, then click OK.
Notice that the Default Result auto calculates using the calculation and input values provided

In the blank row under the Variable Name field, type Conduit and enter the Description Conduit Length, then click the fx button to open the formula editor.

Select the Fields value and Operators as indicated below to create the displayed formula, then click OK.

In the blank row under the Variable Name field, type Volume2 and enter the Description Conduit Volume, then click on the fx button to open the formula editor.
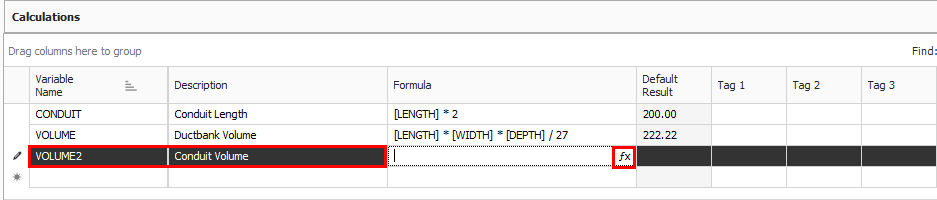
Enter the following formula, using the PI() function from the Functions > Math tab, the radius and length from the Fields tab, and the available Operators tab, then click OK.

In the blank row under the Variable Name field, type Volume3 and enter the Description Backfill/Concrete volume, then click on the fx button to open the formula editor.

Enter the following formula, selecting the already created calculations from the Fields section. Click OK.

In the blank row under the Variable Name field, type Concrete and enter the Description Concrete type, then click on the fx button to open the formula editor.

Enter the following formula, selecting the table value from the Fields tab, then click OK.

A default result will not appear because a value from the table has not yet been chosen.

Notes can be utilized to provide guidance to you on how to use the Cost Item Assembly or provide further clarification on what the various inputs are requiring or how the calculations are being performed. This field supports rich text editing, meaning users can copy and paste from an editing tool various graphics or formatted text such as bold text, bulleted or numbered text, hyperlinks to websites, or various fonts. The Notes data block is displayed on the right side of the Cost Item Assembly Record screen.
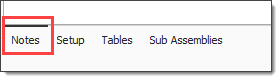
Click on the Notes tab in the bottom right corner.
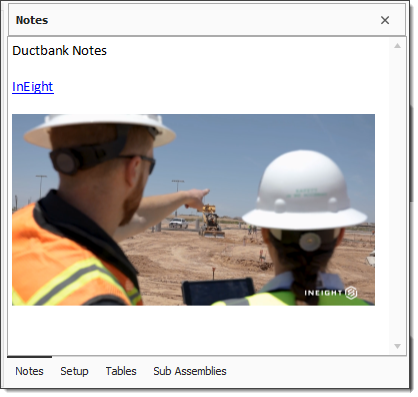
In the Notes text box, type Ductbank Notes.

Right click within the notes section and select Hyperlink.

Type in a link to your SharePoint or document sharing site, then click OK.
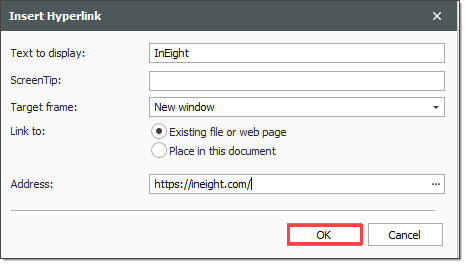
Note how the hyperlink appears in the notes section.

Still in Notes, copy a picture or drawing from your computer, then Paste it into the notes section.
The results of calculations can be assigned to any number of different fields in the Cost Items data block of the Cost Item Assembly record. It is common to link dimensional calculations to the Forecast (T/O) Quantity fields of various cost items, but calculation results can be linked to many other fields such as Productivity fields, Description fields, and even Resource Employment fields such as Quantity or Code. You can link multiple cost item fields to a single calculation by holding the CTRL key. To link a calculation to a cost item, you right click on the cost item field and then either select to link to the calculation result from the context menu or from the ribbon.

Expand your Cost Items window so that you can see all the cost items.

Right click on the Excavate Ductbank Forecast (T/O) Quantity field and select Link this field to Calculation Result.

You create calculations prior to linking the values field. The linking of calculation results is similar to linking to Excel values except all linked values update automatically.
Select VOLUME, then click OK.
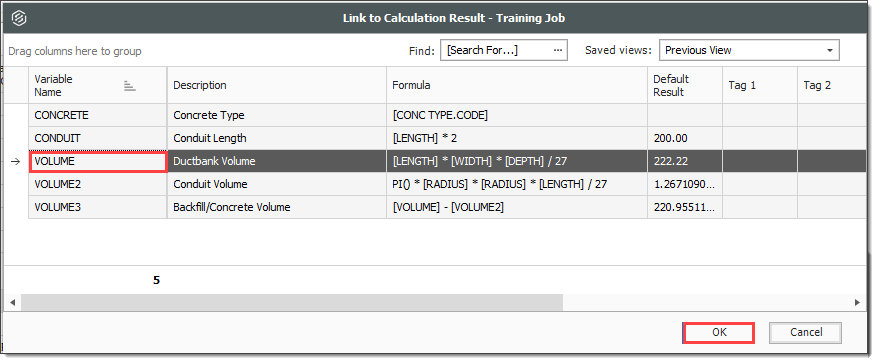
Note how the Forecast (T/O) Quantity field is now populated with a linked quantity

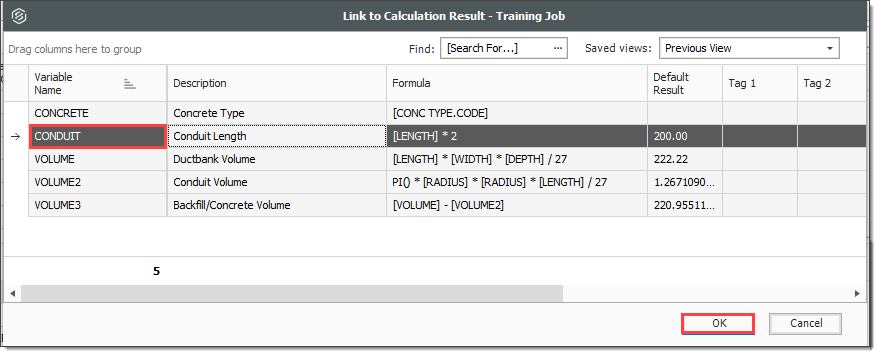
Right click on the Install Ductbank Conduit Forecast (T/O) Quantity field and select Link this field to Calculation Result.
Select CONDUIT, then click OK.
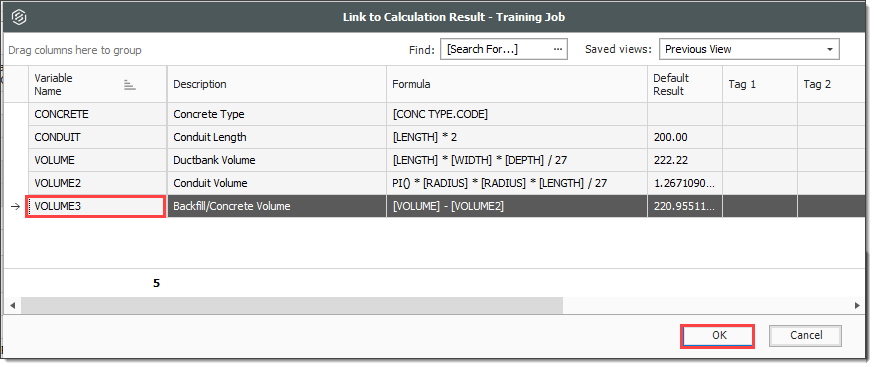
Select the Forecast (T/O) Quantity field for Pour Concrete, hold down CTRL, and select the Forecast (T/O) Quantity field for Backfill.

Right click and select Link this field to Calculation Result.
Select VOLUME3, then click OK.
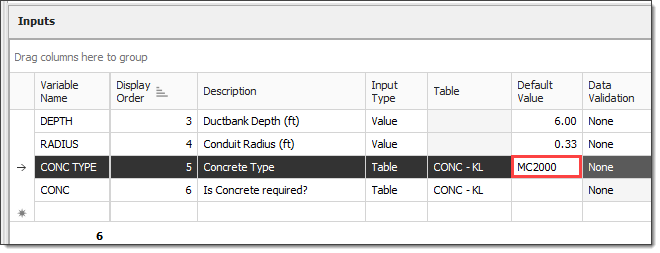
In the Inputs data block, select the Default Value field for the CONC TYPE input.
Select MC2000, then click OK.

Notice that this value is now populated in the Default Value field.
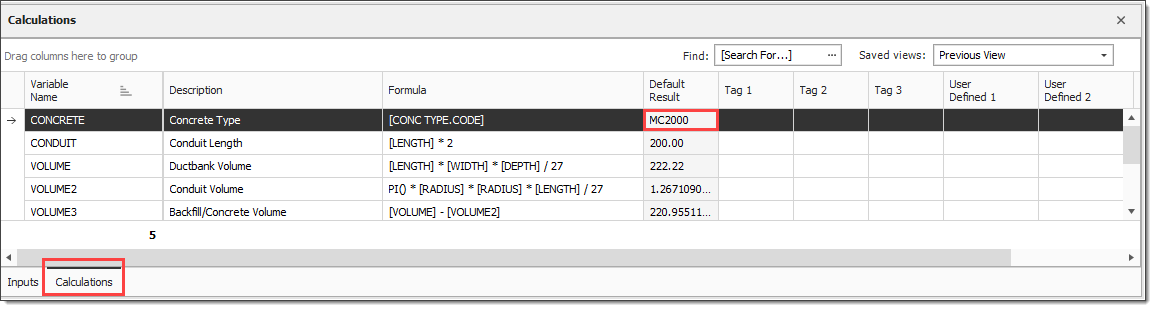
Navigate to the Calculations data block.
Note that the Default Result field is now populated
In the Cost Items data block, right click in the Optional Code field for the Pour Concrete cost item, and select Link to Calculation Result
Select the CONCRETE calculation, then click OK.
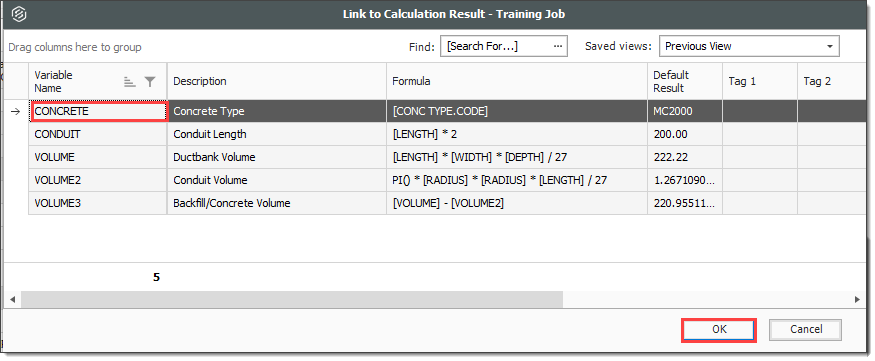
Note how the optional code for Pour Concrete is now populated

Additional Information
9977 N 90th Street, Suite 250 Scottsdale, AZ 85258 | 1-800-637-7496
© 2024 InEight, Inc. All Rights Reserved | Privacy Statement | Terms of Service | Cookie Policy | Do not sell/share my information